New home décor ideas every month:
Subscribe to the Tulip for Your Home newsletter for monthly home décor inspiration.

Beautiful results in four easy steps:

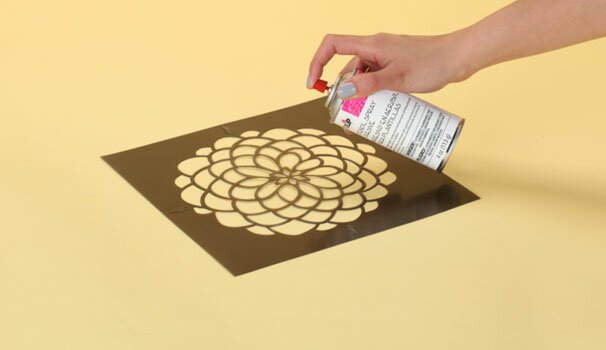
  • Step 1: Spray

    Spray matte side of Tulip® Textile Stencil with a light layer of Tulip® Stencil Spray Adhesive.

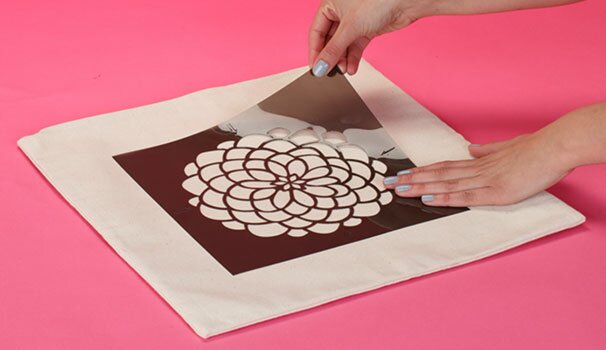
  • Step 2: Press

    Press Tulip® Textile Stencil in place adhesive side down to create a temporary bond to fabric.

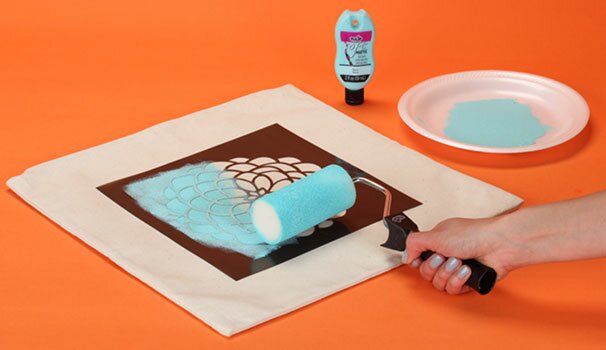
  • Step 3: Paint

    Use Tulip® Paint Roller to lightly apply Tulip® Soft® Fabric Paint evenly over stencil openings.

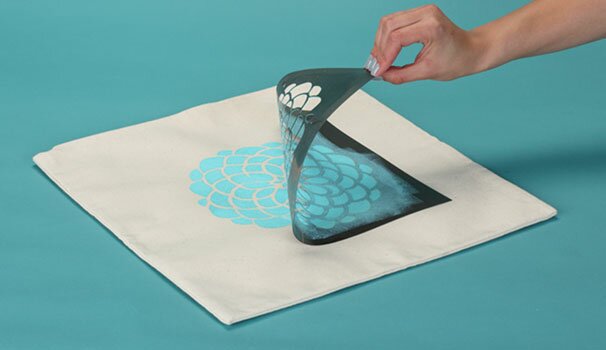
  • Step 4: Reveal

    Remove Tulip® Textile Stencil to reveal your design! Let paint dry up to 1 hour. Clean stencil immediately.

Watch the "how to" video and others on our video page

Helpful Hints and Tips

Getting Started:

  • Protect your work surface with a Tulip Surface Cover, plastic tablecloth, or plastic trash bags.
  • Tulip For Your Home pillow covers are prewashed, but if you use other fabrics, be sure to wash before painting to remove sizing and ensure the paint penetrates the fibers in the fabric.
  • To prevent paint from seeping to back of pillow cover, insert waxed paper inside pillow cover.
  • Use a paper plate for a disposable paint tray and for easy cleanup.

Preparing the stencil:

  • Using a fine, solid mist of spray adhesive, spray the adhesive on the matte side of the stencil. Let dry a minute, and then press onto the pillow cover. Be sure to press every edge of the stencil firmly with fingers to prevent paint from seeping under the stencil.
  • To prevent accidentally rolling paint past the edge of the stencil and getting onto fabric, place masking tape around all four sides of stencil.

Stenciling:

  • Less is more when stenciling, so be sure that the roller is not oversaturated with paint. Gently roll on one light coat for a transparent look and two light coats for more opacity, letting paint dry between coats.
  • Avoid applying too much pressure when using the roller to prevent paint seepage or roller damage.
  • Let paint dry for a few minutes before peeling off the stencil to prevent smearing.
  • After peeling off the stencil, if you missed areas with paint, grab a small paintbrush and fill in with paint to complete the design.
  • Before applying the smaller motif stencil over the stenciled background, be sure paint is completely dry to touch, approximately 1 hour. Then repeat same steps for motif stencil as the large background stencil.
  • Tulip For Your Home Large Stencils are multipurpose, repeatable, and may be used for larger projects. Simply pop out the registration arrows on each edge of the stencils and use to align and repeat the pattern across large surfaces.

Cleanup

  • Wash paint from stencils immediately to prevent paint buildup and fuzzy edges on the stencils.
  • Wash roller thoroughly with running water until clear, then roll over paper towels to dry. Roller can be washed and reused at least 24 times!
  • Store sticky stencils between layers of waxed paper to keep ready for your next project.

Available now at:

  • Hobby Lobby
    Available at all locations.
  • Joann
    Click here for store List (PDF)
  • Michaels
    Click here for store List (PDF)
  • iLoveToCreate
    Shop iLoveToCreate.com